
This site is a participant in the Amazon Services LLC Associates Program. We are compensated for referring traffic and business to Amazon and other companies linked to on this site
In my opinion, the electric bike battery is the most important part of the electric bike, and the reason I give it this importance is because it is the part responsible for prolonging the time you enjoy the electric bike, unlike the motor, which comes to me in the second place in terms of importance
This is why battery problems are very important
In this post, we will present a way to reset & test the chip that controls the battery, or which is called the BMS (battery management system).
In this post, I will start by explaining how to determine that the problem is from the BMS, as well as what evidence will appear on the battery that supports the idea of having a problem with the BMS, then I will explain to you how to do the reset.
So if you sure that you BMS Issue then, skip to the last section of this post.
What are the evidences that prove you have issue in your Battery BMS?
1-You can’t startup your ebike without charging the battery for long time.
One of the most important roles of the BMS chip is to determine how the voltage in the battery cells is being used, For Example:
The BMS will turn off the battery when the actual voltage reaches 10%. however the BMS reserves some voltage in order to turn on the lights and the rest of the other functions that you may need for necessity
This means when you see that the battery is completely drained its still have 10% reserved for other ebike functions
Based on this, if the bike battery is discharged completely and you notice that you cannot turn on the bike unless you put the battery on charge for a long time, this is considered evidence that the battery BMS is unable to measure the level of voltage inside the battery cells and therefore does not allow the battery to be operated.
2-Red Light & charge
One of the signs of a problem with the BMS battery is the presence of a red light and your inability to charge the battery
Note: This problem may occur for more than one reason, not only for BMS, and for this we will move on to the next part, which we will explain in a practical way how to make sure that there is a problem in the BMS.
How to identify Battery BMS issues.
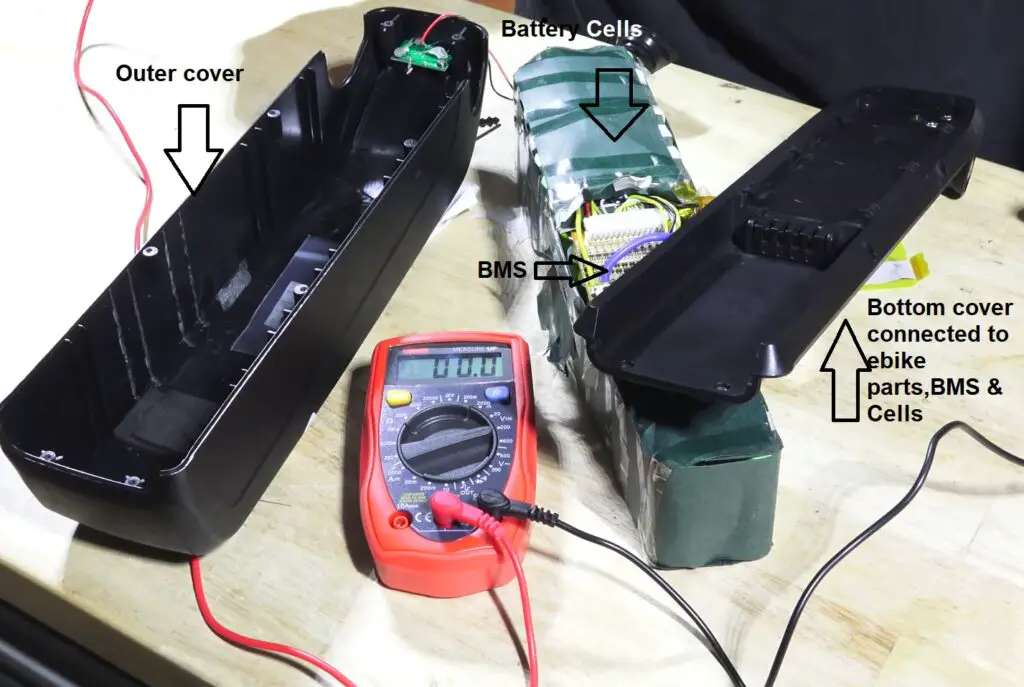
The electric bike battery consists of four main parts, which are the bottom cover that connects to the controller, the motor, and the BMS (connected to the cells).
The second part is the top cover that protects the battery cells
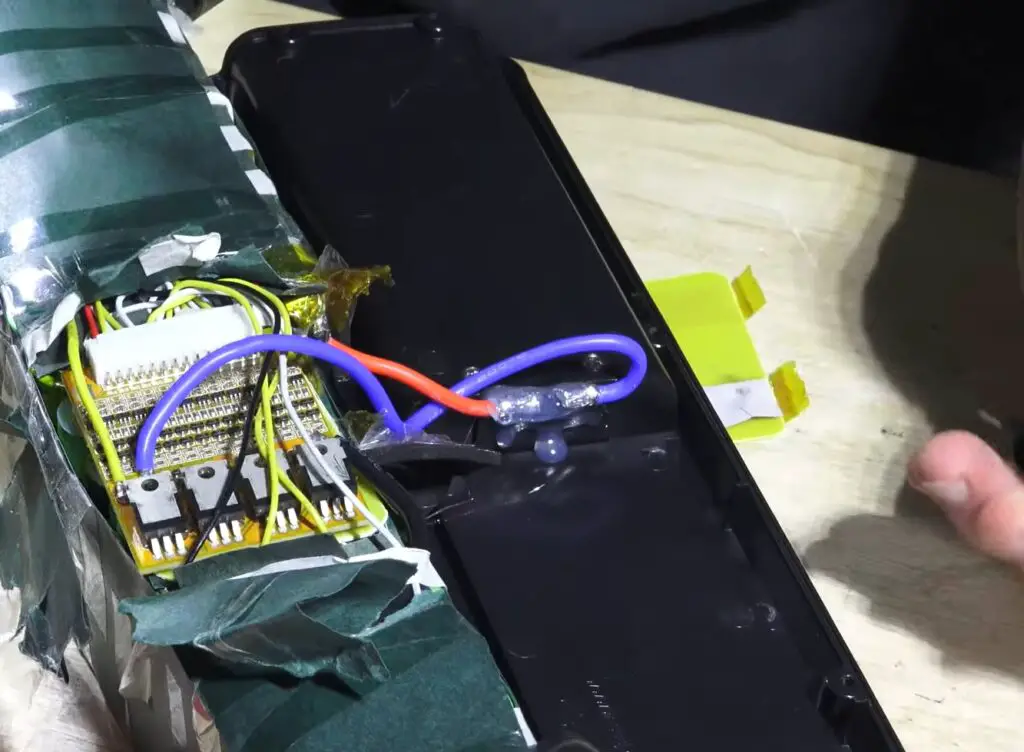
The third part is the BMS chip
Finally, the battery cells
Based on this, we will check all parts except for the cell protection cover in order to determine if there is a problem with the BMS or not.
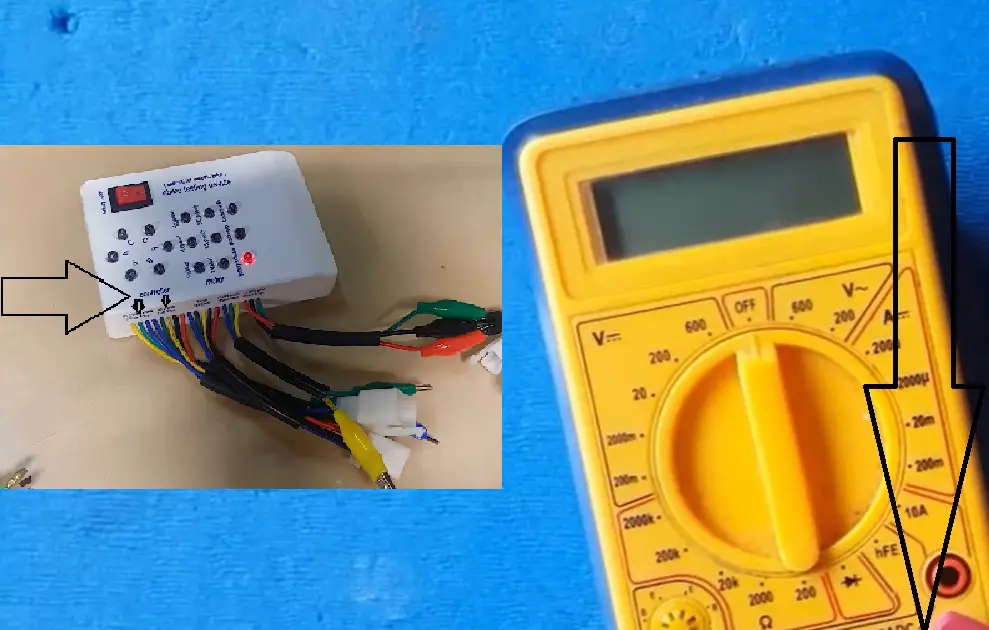
Tools Required:
Multimeter \voltmeter
1-Testing Bottom battery cover.
Testing the bottom cover of the battery is an apparent test to verify that the welding is good and without any damage, and its PINs must also be checked that it is intact.
2-Testing Battery Cells.
Testing battery cells takes place in two steps:
1-The first step is to measure the total internal voltage of the cells and compare it to the original capacity of the battery.
2- Then, if necessary, we can measure each cell separately.
Measuring Total volt of the battery.
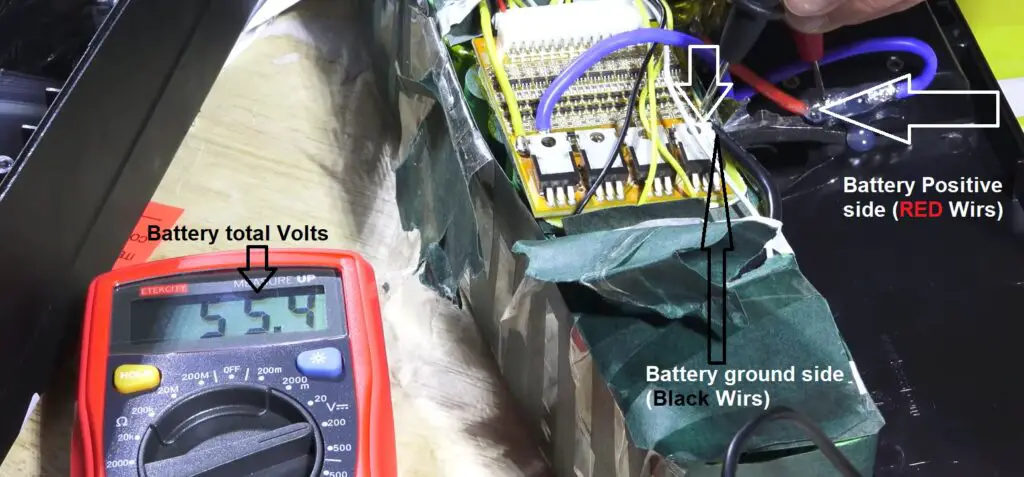
First you need to make sure that you put the battery on charge for long time.
In order to test the total voltage in the battery, you should use a multimeter/voltmeter and put the red probe on the positive wire in the battery and put the black probe on the ground wire
if you find the reading close to the total battery capacity then all the cells are working as excepted, however if the total reading were very low then you will need to test all cells separately.
Testing Battery cells separately.
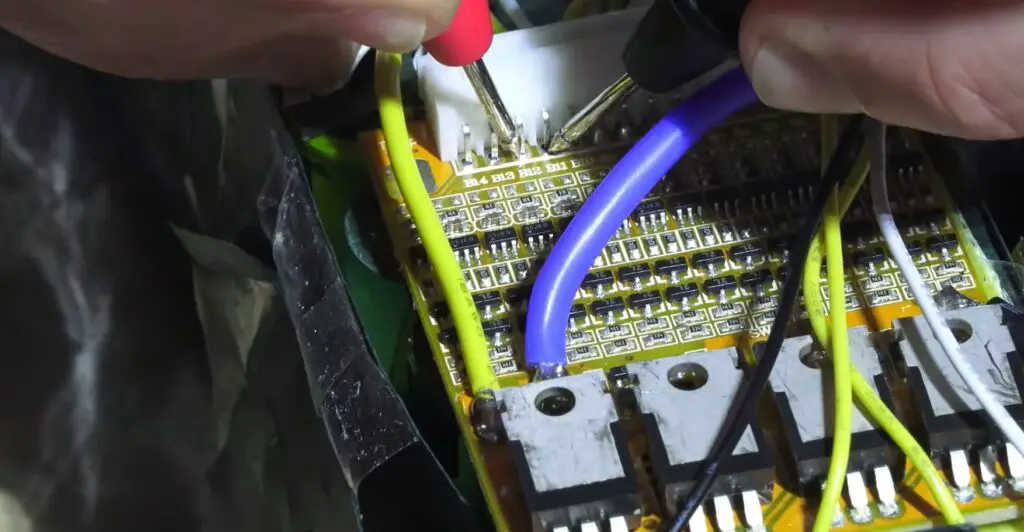
In order to measure the voltage of the cells, you will find a symbol with the letter B, which indicates the connection of the cells in the battery.
In order to measure the voltage of the cell, you will put the red probe on the B1, then the black probe on B2, it is supposed to give you a value between 3.7 volts or a little higher if the cell is fully charged.
In order to measure the next cell, place the red probe on B2, the black probe on B3, and so on
Repeat this process until you have measured all cells.
How to reset Ebike Battery BMS?
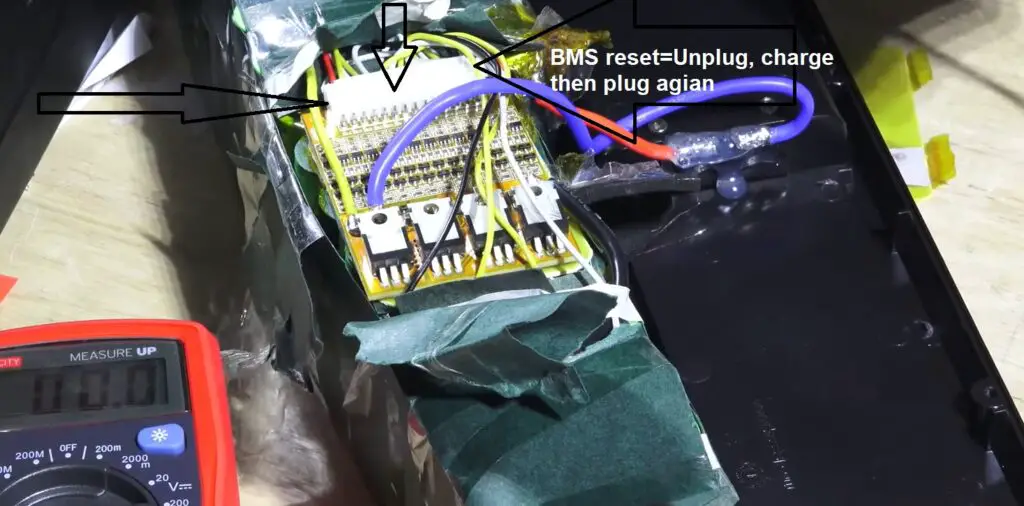
After we got to know how to identify the BMS problem, in this part we will do a BMS reset, which means returning the BMS software to the default
The good thing is that the reset process is very easy and requires only three steps:
1- Unplug the BMS cable
2- Connect the charging cable directly to the battery and charge it for 20 seconds
3- Install the BMS cable again, and thus you have returned the internal software of the BMS to the default.
Conclusion.
In order to make sure that there is a problem with the BMS, you must make sure that the main welds in the battery are intact and that the total voltage of the battery cells is correct. This is evidence that there is a problem with the BMS
In order to reset the BMS, disconnect its main cable, charge the battery for 20 seconds, then connect the BMS cable again
Pingback: Why is my e-bike battery dying so fast? (Explained)
Pingback: 12 Reasons why is my eBike battery not working?(Solved) -
Pingback: How do you fix an electric skateboard that won't turn on? (FIXED) -
Pingback: Why is my electric skateboard dying so fast? (Repaired) -